Here's another DIY stud project my bF and I recently finished. Yes, I ain't gonna take all the credit. I did most of it but he helped me since it's his shoes anyway lol!
Now I know why freepeople.com are selling these babies for over $100!
TOOLS OF THE TRADE
Converse Sneakers - $40
1/4" Pyramid Studs (approx. 100 pcs) - less than $10
Labor of Love - Priceless!
Hope you all enjoyed the holidays. Mine was very low-key.
Cheers to a fab New Year ahead of us ;)
I finally got done studding the white blazer that I got from yesstyle.com. Sorry, I wasn't able to take a before photo because I was so excited to get my stud on! My order also came with this super cute clear bear dangling earrings. Free with any purchase of "Cherry Girl" brand item...
Now back to studding. I was going to use the hotfix nailheads but ended up using the real pyramid square studs (with prongs in the back) to make it look more like the real thing. Whew! It took me about 5 hours to do it but ofcourse with breaks here and there. My hands hurt after but it was all worth it. I'm so proud of myself ;)
Up close
Tools of the trade
White blazer/jacket (leather material preferably)
3/8 inch pyramid square studs (approx. 320 studs depending on the size of your blazer) which can be purchased from ebay, studsandspikes.com, or spikesandleather.com
Jewelry/needle nose pliers/butter knife
I find it hard to do a tutorial so check out these instructional vids from youtube...
Another studding project I finished over the weekend...
I saw this design online but it doesn't say what brand. I like it though.
Tools of the trade
Black blazer (I got mine from Forever 21 for $29.80 + tax)
Hotfix 7mm silver nailhead squares from ebay
Hotfix applicator wand
Check out my previous post for hotfix application instructions.
Up close
Notice the Forever 21 tag still on lol!
My weekend went by so fast. Did I mention I'm going to be the Maid of Honor (more like "Maid of Horror" lol!) for my friend's wedding on May 2010? Gotta plan the bridal shower and bachelorette's party soon. I'm so nervous about giving a speech/toast since I'm not good in public speaking. I already got my dress but it's a little tight on the waist. Might have a wardrobe malfunction on the day of so I need to be serious about losing weight. I should since I have enough time before the wedding. I swear after the holidays, I'll be back on track.
Have a great week ahead of you all!
***
First off, I want to thank everybody who took their time to leave comments on my previous post. Going through a break up is definitely not easy. He is still ignoring my calls and text messages. I don't know how long I have to wait but I'm sure I'll get by. I'm glad I have this blog and y'all, my blogger support group, to help me through this. I really appreciate your overwhelming support. My two precious cats are also comforting me as if they feel I'm hurting.
Although I have friends, I am very discreet when it comes to matters of the heart. Why? Because the 'BF' shares the same set of friends - that I also met thru him. I don't really have a 'bestfriend.' I considered the 'BF' as my bestfriend...and now he's gone. As of now, I guess none of them knows what I'm going through. Only one close friend is aware of my blog (I don't think she checks it as much) and I haven't heard from her so I guess she's clueless as well. I hate to bug her coz I know she's tied up with her wedding preparations. Good thing I'm off this Thanksgiving week or else I'm gonna lose it at work!
Since I had to be busy to keep my mind off of this craziness, I picked up a new hobby. I'm not a crafty kind of girl but since I'm obsessed with those studded jackets I've been seeing around, I started...
DIY PROJECT STUD CRAZEEEMy finished items:
(Click photos to enlarge)As usual, my camera has been acting up and the gold and silver colors are not really showing well.
a) Studded Blazer
Up close
b) Studded Cardigan
c) Studded Skirt
Up close
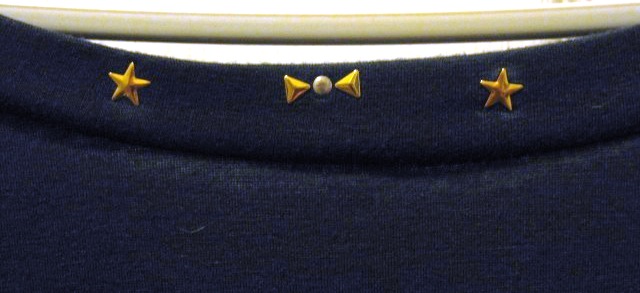
d) Studded Tee
Up close
e) Studded Off Shoulder ShirtUp close
f) Studded Leggings
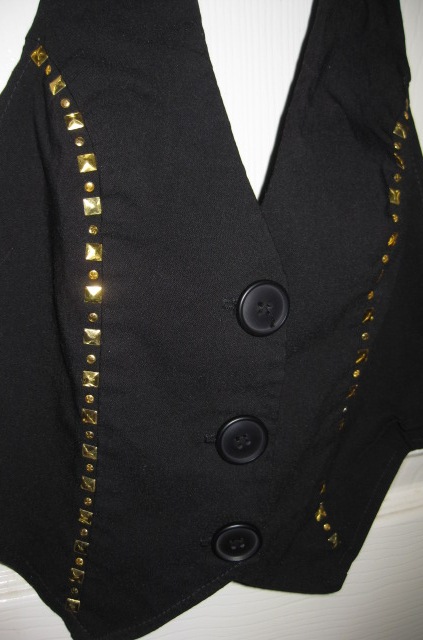
g) Studded Vest
Up close
Tools of the trade:
(all from eBay)
Hotfix applicator/wand
'I used the "Victoria Lynn Crystal Crafter" around $15 plus. It came with different sizes of tips for various sizes of hotfix embellishments. It also came with a hands-free support stand. The metal end of the applicator heats up pretty fast so be careful. I suggest getting this applicator for precise application. If you don't want to spend that much, your household iron will do.
Hotfix studs
What are hotfix? Hotfix are flat back embellishments with pre-coated heat-sensitive glue. They come in different sizes and shapes (e.g. swarovski crystals, rhinestones, pearls, metal studs). Usually sold per gross(144 pcs). For my project, I used mostly metal studs. I could have used the real studs with prongs on the back but it looks harder. I'm sure my hands will hurt putting the studs in even if I have the stud setter.
Instructions:
1) Choose the correct size tip for the hotfix embellishment you selected. Sizes are marked on tips. Screw it into the unplugged applicator.
2) Plug the applicator. Pre-heat for about 2 minutes. The tip gets very hot so be careful. Do not touch the metal end.
3) Rest the applicator on the hands-free support stand when not in use.
For Crystals and Pearls:
Use concave tips
1) Place the crystal side up on your work surface (glue side facing down on the surface)
2) Vertically position the applicator over the iem and with a very light touch, pick up the item in the cup at the end of the the tip. Do not force the item into the tip.
3) Turn the applicator upright and wait for about 10-12 secs until glue gets shiny and starts to bubble. Time will be less for smaller items, and slightly longer for bigger ones.
4) Holding the applicator vertically, lightly tap the crystal/pearl onto the surface you want to embellish. The crystal/pearl will attach to the surface and slide out of the tip. No need to use extra pressure. Gentle touch will do. If it gets stuck in the tip, just insert a straight pin into the slot of the tip and gently push it out onto the surface to be be embellished.
For NailHeads, studs, and irregular shaped objects:
Use flat tips
1) Position the items (glue side down) in the desired design.
2) Using the correct size flat tip, hold the applicator vertically and apply a light pressure to the stud for approximately 10-15 secs. Larger items require more time. The top of the studs may get scratched if you move the flat tip while heating. You may use a press cloth or handkerchief between the item and the flat tip.
3) If the item appears lose, repeat the process.
Happy Studdingand Happy Thanksgiving Day!
***